.

.

Monday, October 31, 2011

halloween movie night! ♥

Happy Halloween! here are some tips for a scary vintage movie night for halloween! :)


This is what I used:
- Cardboard popcorn boxes I ordered from Amazon
- Real popcorn
- Yellow food coloring for the popcorn (it turns out bright red!)
- Red food coloring to smear all over the inside and outside of the popcorn box.


- Old horror movie poster images I found on the internet.
- “Admit One” tickets I printed from an image I found on the internet.


All in all these inviations were a piece of cake.

and dont' forget the bloody marys!


i added a hallwoeen twist to it ...


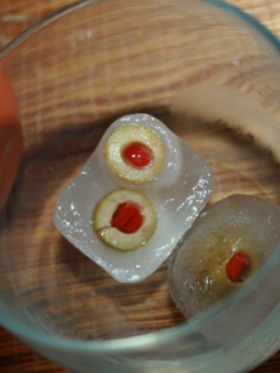
here's my recipe from my website
http://europeancutie.blogspot.com/2011/08/sunday-funday-bloody-mary.html

happy movie watching! and happly halloween! :)

Saturday, October 29, 2011

supercute! homemade apple candles ( real apples!) ♥

here's a supercute idea I made from the apples picked last weekend.. I had so many leftover..I thought of this...super easy and supercute! :)


  • Whether you pick them up from the local market or pick up the drops from an apple tree, you'll wonder why you never crafted with apples before as you start to make these apple votives.
    If you have an apple tree and the apples aren't the best for eating, this allows you to make good use of them for decorating purposes. Do bear in mind, however, that apple votives only last for a few days.
    Choose apples that are firm, as soft ones will wilt quickly near the flame of the candle.

Carve

  • Begin your craft by washing the apple. Remove the stem and core from the apple but don't cut all the way down through the bottom. Leave about 1/8 to 1/4 an inch layer on the bottom.
    You may wish to leave the apple as is, or to carve a design into the body of the apple, much the same way you would carve a pumpkin for Halloween.
    Next you must carve a hole into the top of the apple that is large enough to house a votive candle. You want a small portion of the candle to remain on the outside of the apple.
    Slice a very thin layer from the bottom of the apple that will allow the apple to stand up.

Preserve

  • Pour some pure lemon juice over the apple, taking care to cover all of the areas that have been cut or carved and exposing the inside of the apple to the air. The lemon juice will help preserve the apple a bit longer, and will help prevent the apple from turning brown.

Candle

  • Wipe off any of the juices that may have run onto the apple skin during the carving and cutting process. Polish t
    he apple to a shine using a soft cloth.
    Add the votive candle, making sure it sits stable in the hole that was cut for it. If it seems to tip or lean, carve a bit more of the inside of the apple until the candle sits firm.
drizzle a bit of candle wax on top of the apples and display! :)


Saturday, October 15, 2011

i love my uggs! ♥

on cold chilly saturday mornings i love running errands in my uggs.  i just love my uggs! some people think they are not a cute fashion statement, others think they are, i love them they are warm for the northern cold fall days! :) to each her own i guess! ♥ 

you can get your own uggs here! http://www.uggaustralia.com/
♥ 

 alright im ready to face the brisk chilly day all set ! :) happy saturday! :)

Thursday, October 13, 2011

pumpkin pie face mask bootiful! ♥


you know me always trying new ideas for beauty face masks here's one for halloween! :)

and a little something to do on a rainy icky cold thirsty thirsty night in with the girls!  great with my pumpkin martinis heres my recipe on my other website! http://europeancutie.blogspot.com/2011/09/pumpkin-martini.html
:)


If your skin's feeling a little rough after a summer of sun exposure, you'll want to give it some moisture with a homemade mask. Making this pumpkin enzyme face mask, it's super easy: all you need is some pumpkin pie puree and a few other common ingredients, and you'll be left with a glowing -- and yummy smelling -- face!


Ingredients:
  • 1 can pumpkin pie puree (organic if possible)
  • 2 tsp. fresh lemon juice
  • 1 tsp. pumpkin seed oil
  • 1 pinch cinnamon
  • 1 pinch nutmeg

Directions:

  • Place half the can of pumpkin puree in a bowl and mix in the lemon juice, pumpkin seed oil and spices.
  • Apply the mask to the face and allow your skin to soak up the goodness for at least 10-15 minutes.
  • Best if used while soaking in a warm tub, steam helps to further penetrate and open pores. Wash off with warm water.
The recipe makes two treatments, and will last up to five days in the refrigerator. enjoy!

Tuesday, October 11, 2011

Saturday, October 1, 2011

save the ta ta's! ♥

october is breast cancer awareness month here are some tips, ideas and crafts ....:) ♥


* Dietary antioxidants help reduce DNA damage and contribute to gene stability, which can be protective measures against breast cancer.

* High intake of fruits and vegetables with reduced risk of breast. (green leafy vegetables and fruits are high in antioxidants)

* A healthy diet optimizes immune function.

* Good fats can help reduce the risk of cancer. The good fats include Borage oil, evening primerose oil,
flax oil, olive oil and fish oil.

* According to a new study published in the American Journal of Clinical Nutrition, consumption of soy, fruits, and vegetables helps reduce the risk of developing breast cancer.

* Engaging in physical activity, maintaining a normal body weight and eating a healthy diet can help your breast health.


* Eat the right amount to maintain a healthy weight

* Limit red meat consumption


heres a craft from bottlecaps...♥

                                                                                ♥


Don't throw away your bottle caps if you like recycled crafts. You can make a variety of neat bottle cap magnets using things around the house. Use these tips to make bottle cap magnets that you can use on your fridge.


Things You'll Need ♥


  • Metal and plastic bottle caps
  • Magnets
  • Decorations
  • Glue gun

    • 1
      Buy round magnets that fit inside the bottle caps or cut up strips of magnet into pieces that fit inside the back of the bottle caps.
    • 2
      Check the magnet to see which side sticks to the fridge. You want to glue the non-magnetic side so to the bottle cap and leave the magnetic side exposed so it adheres to metal.
    • 3
      Use your glue gun to attach the magnets to the bottle caps. Add a little dab of glue to each bottle cap and then place the magnet on the glue. Press to adhere. Hold the magnet in place until the glue dries.
    • 4
      Set the magnet aside for an hour so the glue has time to set properly. If you stick it to the fridge too soon, the magnet will come away from the bottle cap and you will have to reglue it.
    • 5
      Add decorations like stickers, photos or glitter to the bottle cap lid. Or decorate the bottle caps in reverse by adding photos or decorations to the inside of the bottle caps. Then glue the magnets to the back of the cap.
    • 6
      Use plastic bottle caps in a variety of colors to make cute fridge magnets. Glue a magnet inside the bottle cap

decorate a pumpkin for breast cancer awareness! ♥

even get your dog into saving the ta ta's...♥
heres the link you can buy your own doggie tank ♥

you can purchase a pink kitchenaid mixer..♥
and bake some ribbon cookies! ♥

heres a healthy recipe from my cooking collection for mango black bean salad ♥
 ♥
 ♥

or add some bling to your keychain..♥

so do something for a good cause this month in support of breast cancer awareness! ♥

                                                                                 ♥

About Me ♥

My photo
My website is designed for a healthier approach on great homestyle european recipes.. I love creating new recipes with a twist on traditional! ♥

click on the pic below help support jdrf! -♥